FinnSource uses the Events Calendar plugin. The below procedures covers creating a single, non-recurring event that is not part of a series. The PRO version of the plugin offers methods for creating recurring events. The procedures regarding a recurring event are illustrated elsewhere on this site.
(For further guidance, please consult the plugin developer’s instructions: Getting Started with The Events Calendar.)
Preparation
Before entering event data, be sure to have all the information you need at hand:
- Name of the Event
- Descriptive copy content (for both content box and excerpt)
- Date/s, Time & Cost
- Venue Location (including street address, if available)
- Event Organizer & Contact Email/Phone #
- Event hyperlinks (to the event, venue, etc.)
- Images (photos, illustrations, etc.) for content and Featured Image
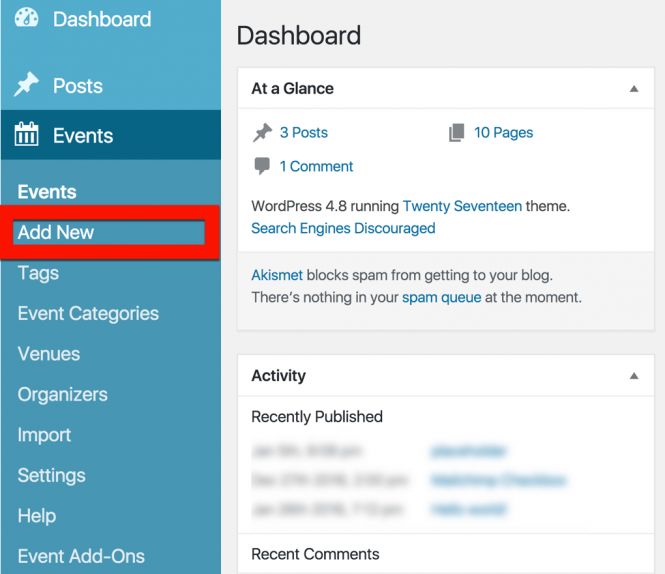
Open a “New” Page
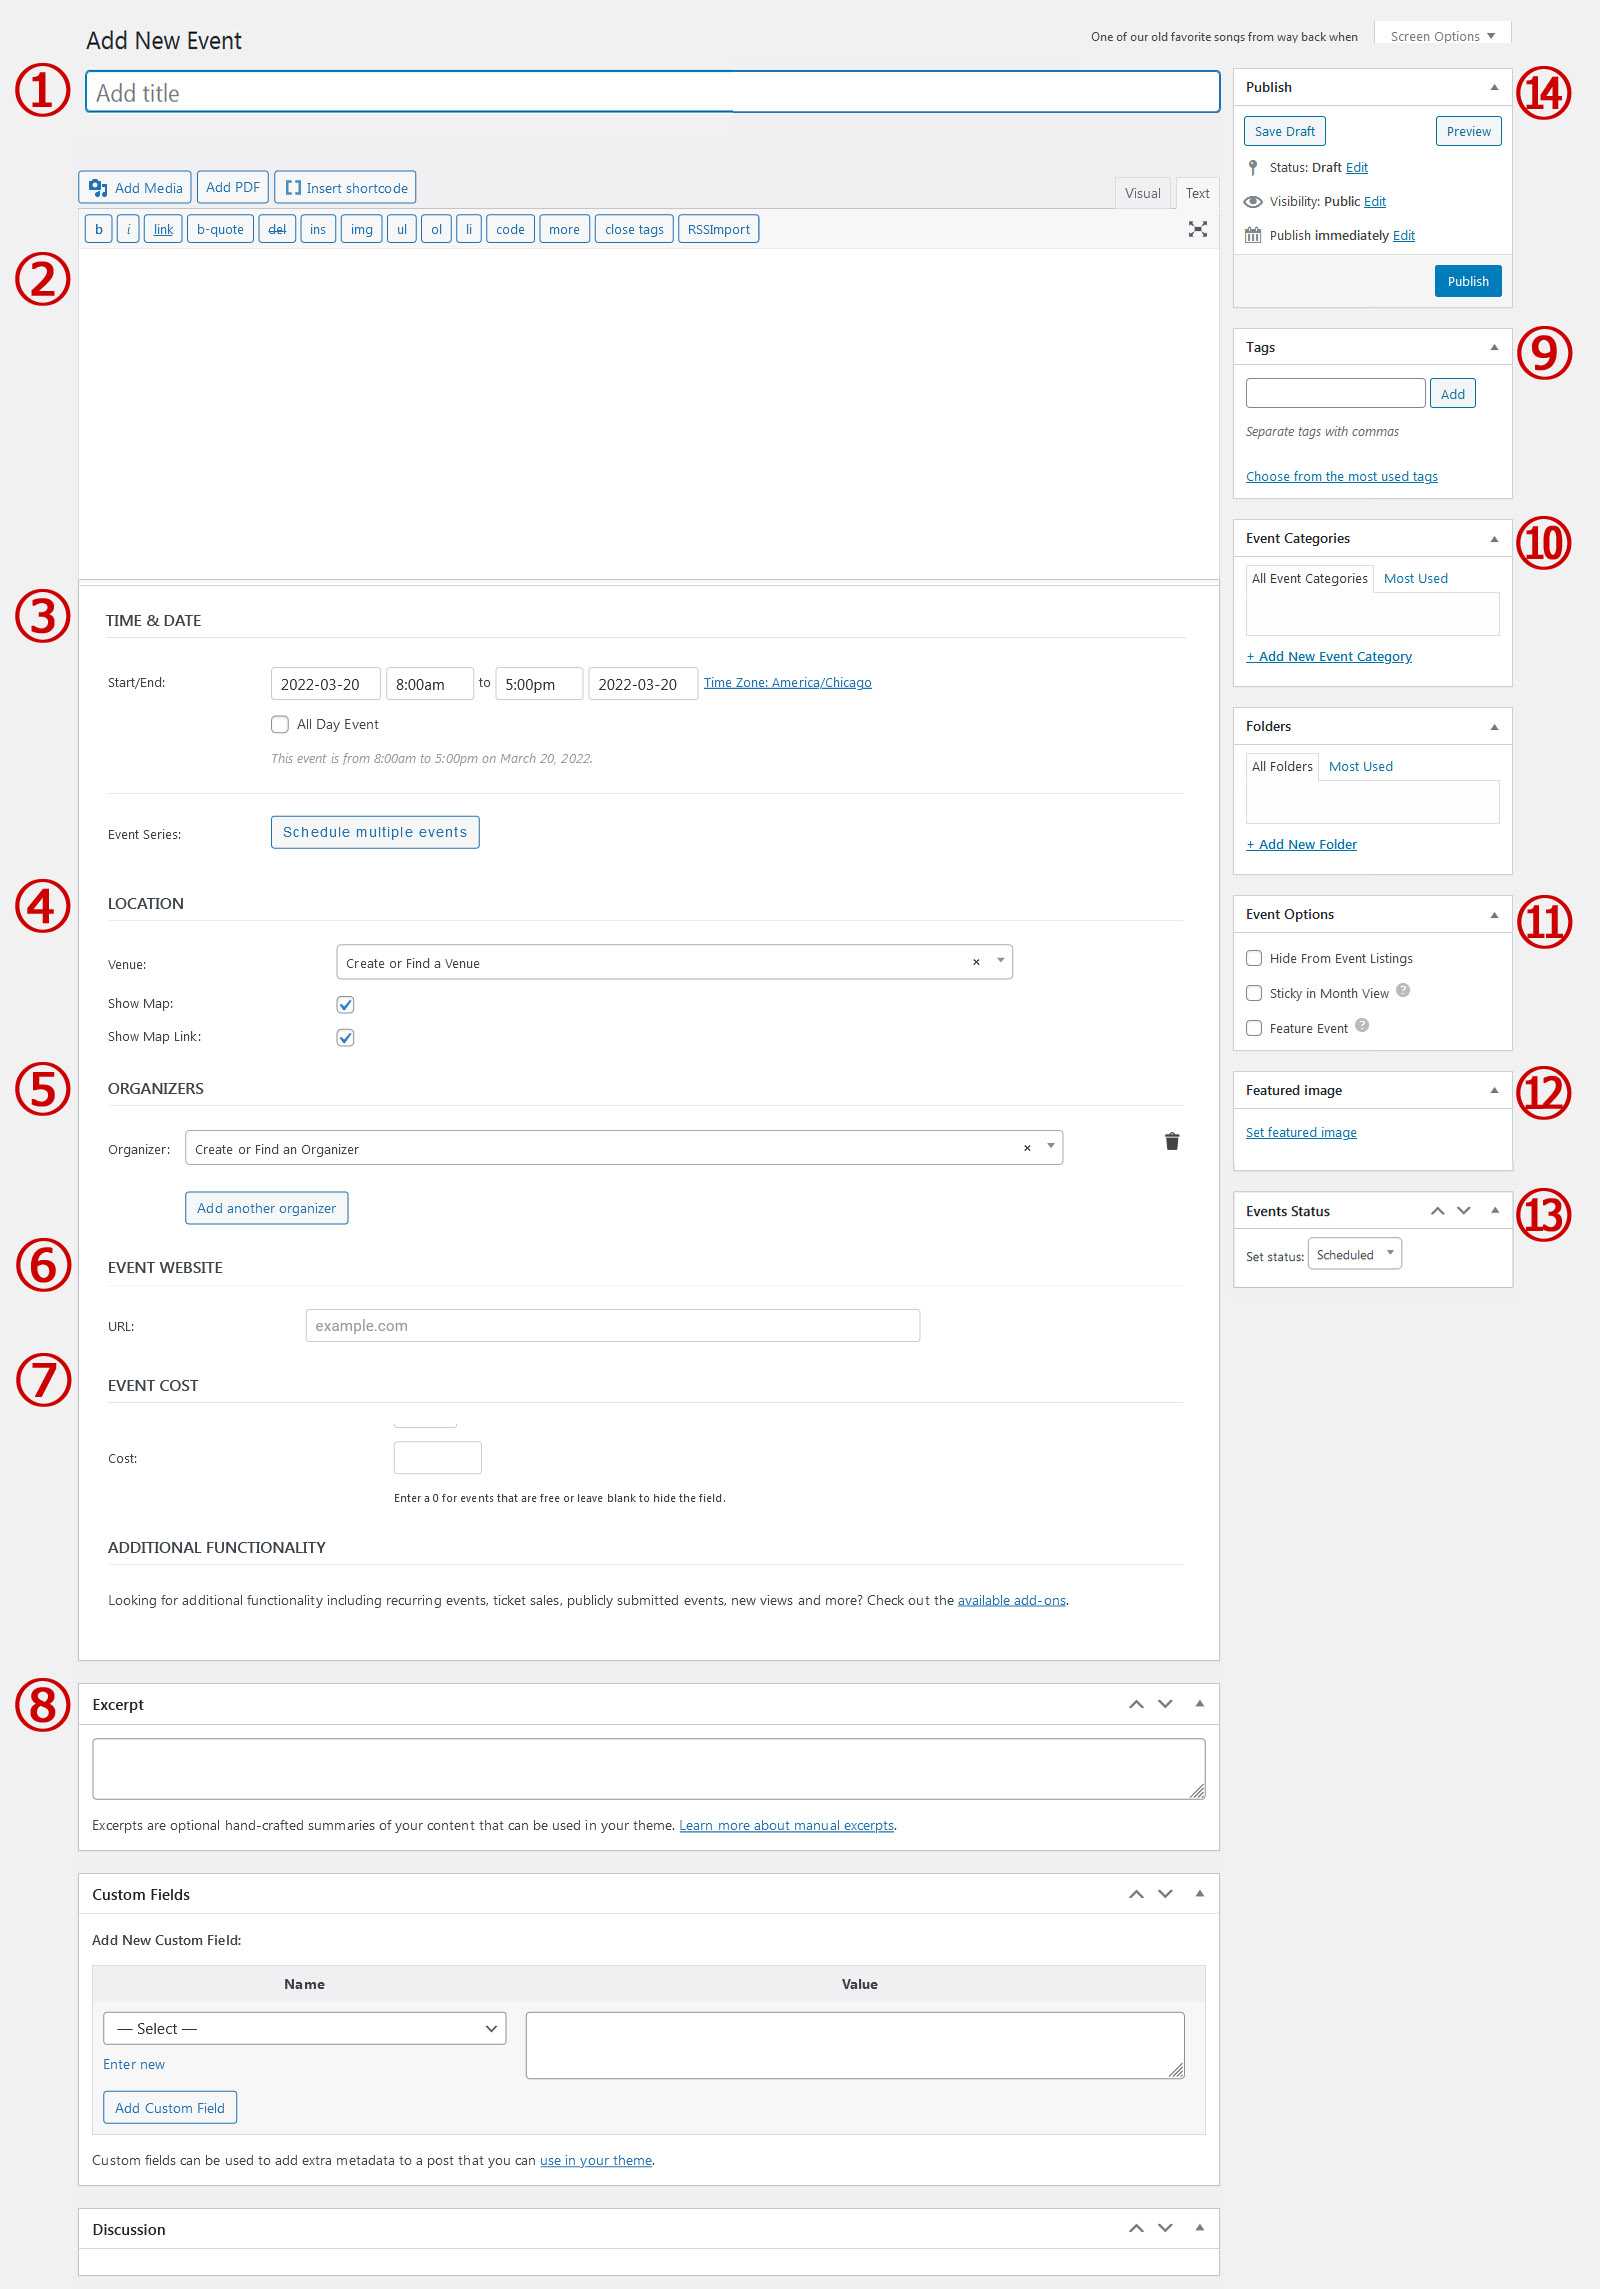
1. Event Title (Name)
It goes without saying that without a name, no one would know how to identify your event. The “title” doesn’t have to be long or overly descriptive; something that is straight to the point.
2. Event Content
Here is where you can be more creative and descriptive with your event. Hint: Breaking your content down into two- or three-sentence paragraphs, rather than writing it all as one long-winded paragraph, makes for both easier online reading (on the part of the reader, especially on handheld devices) and for easier editing by the content creator. Consider the value, too, of adding complementary images.
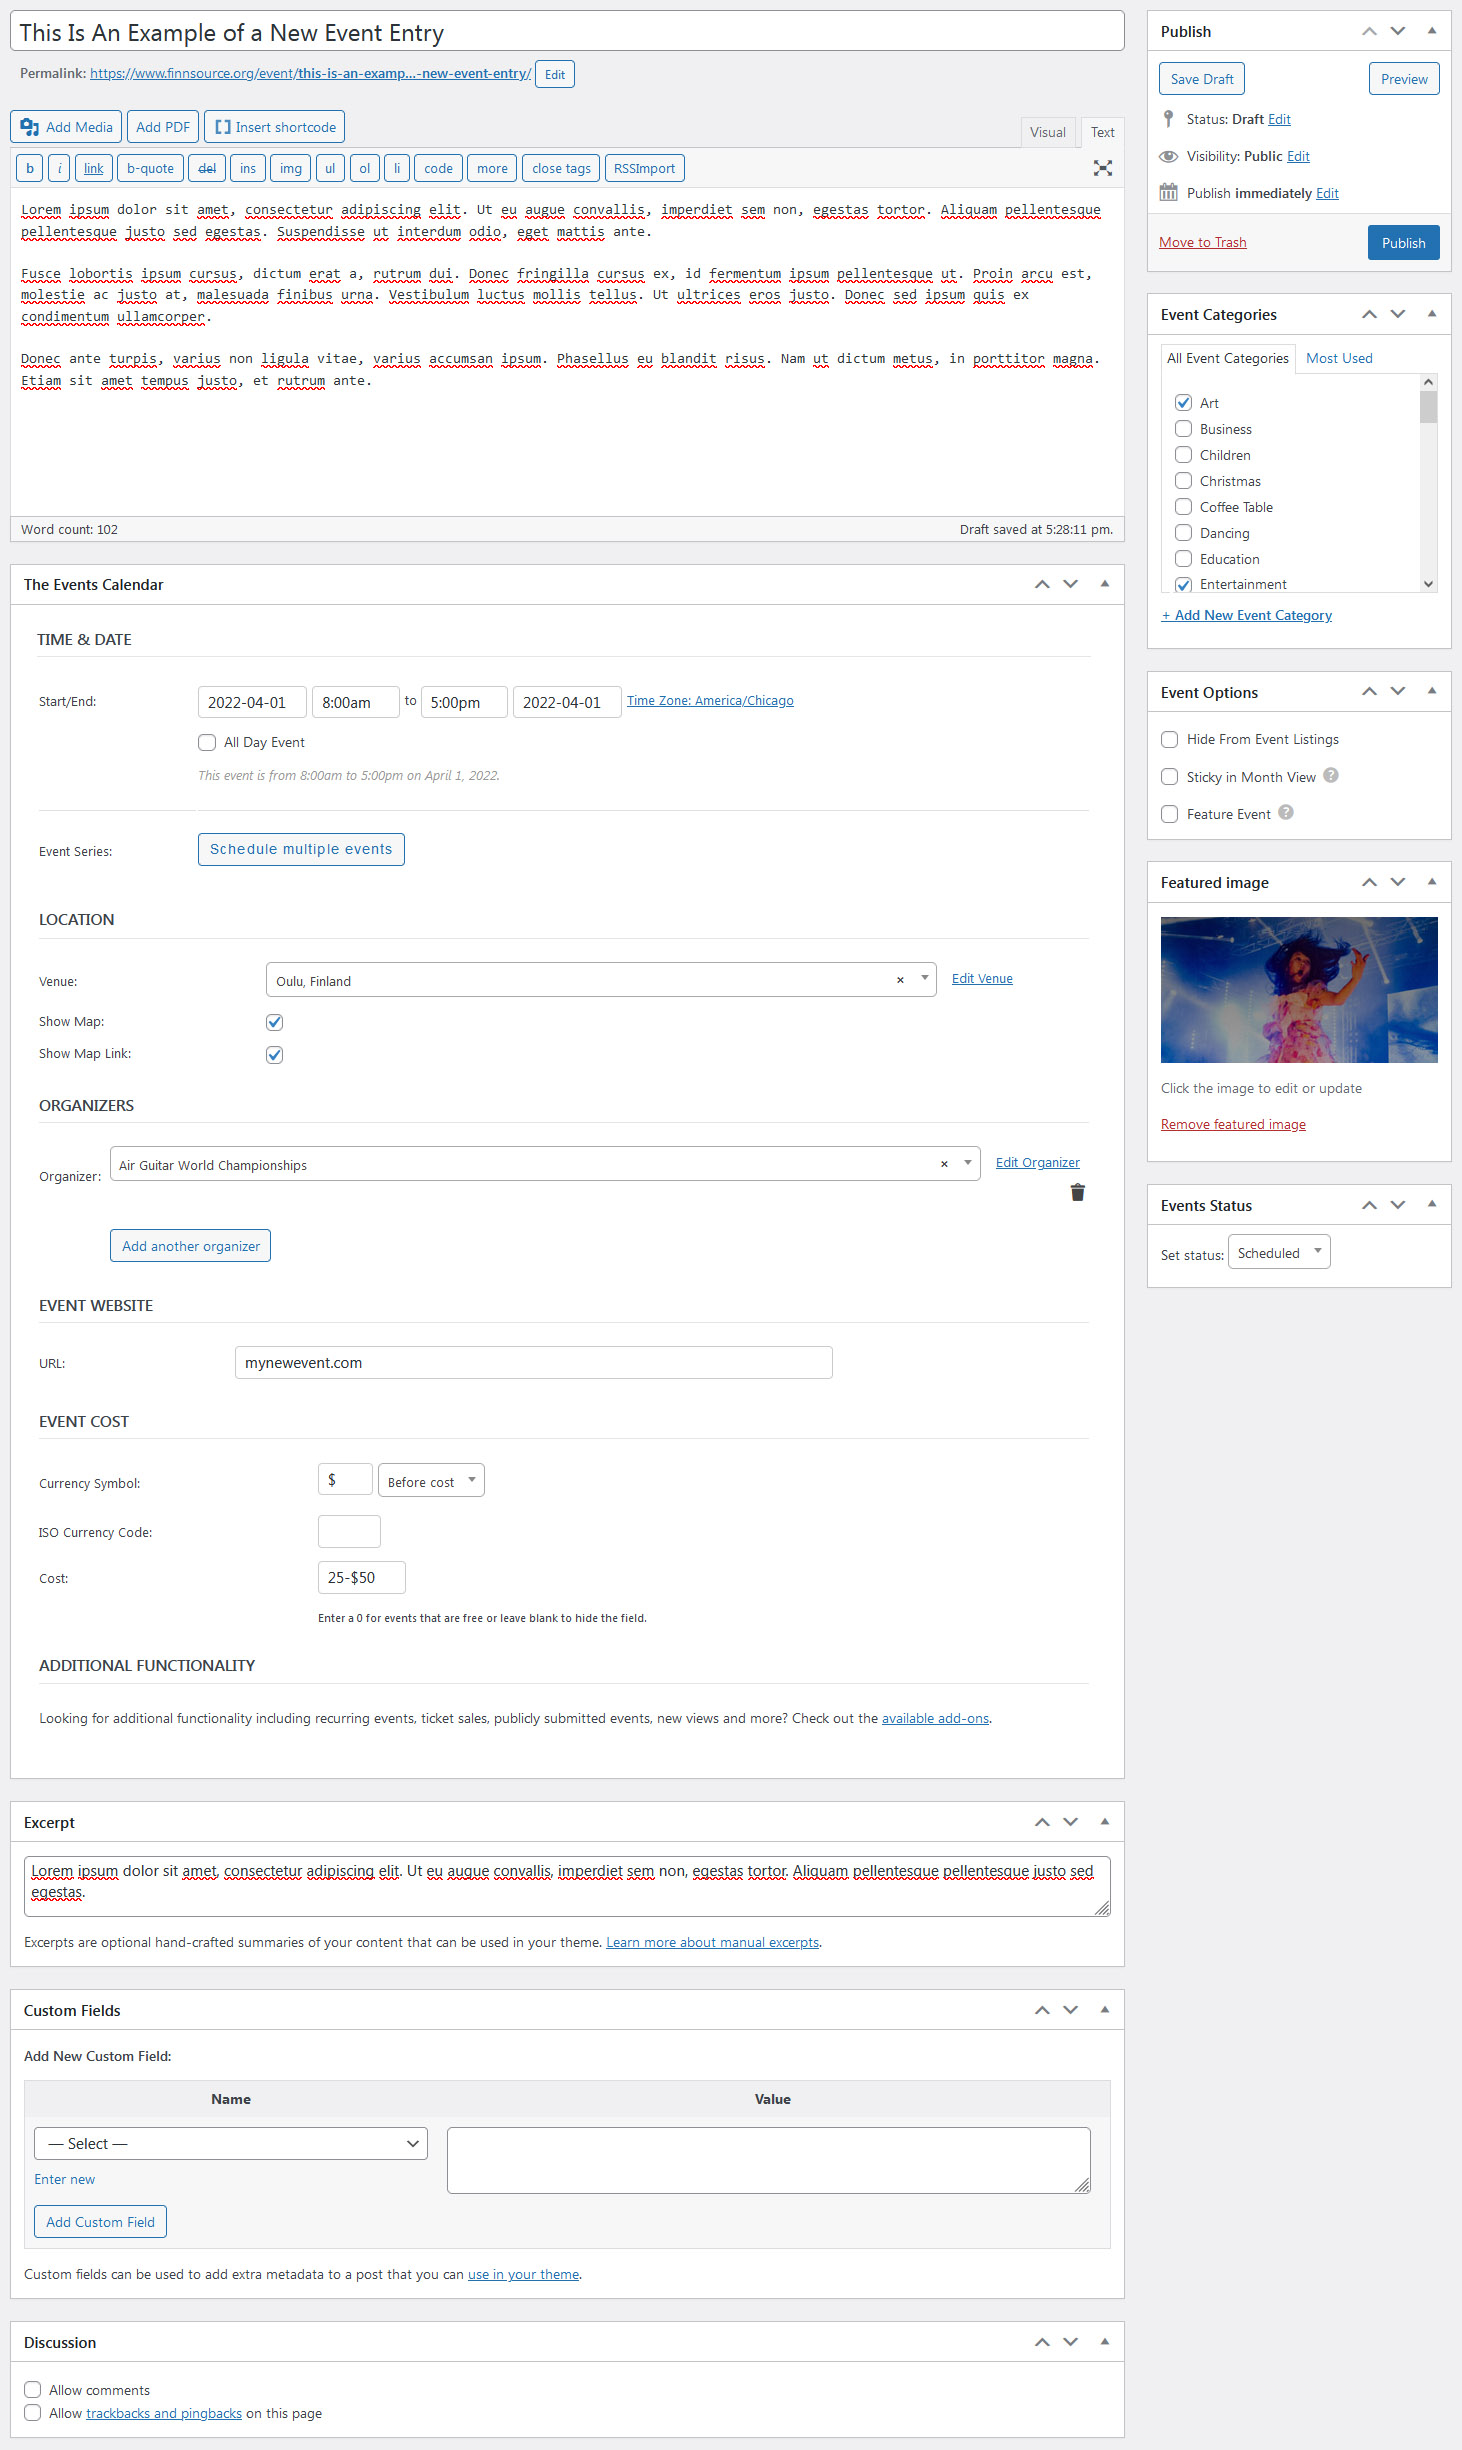
3. Event Time & Date
Of course, events have specific bits of information associated with them that most pages and posts don’t require – start and end dates, for instance, not to mention venues and organizers.
Fields to set all of the above can be found below the description editor, in an area called the events meta box.
Let’s look at each of the settings in this area in turn. First, the date and time fields:
- The Start/End – this is simply when the event starts and finishes. Clicking into either date field will pop up a date picker, where you may select your desired dates from a calendar. Event start and end times may be selected from a drop-down menu, or you may enter your dates and times manually if you prefer. If you already checked the All Day Event box you will not be able to specify a time for your event.
- The All Day Event checkbox is useful when the event is taking place on a particular date (or dates) – but you don’t really know when, has no start/end time (e.g. a holiday), or else feel that the timing is good enough to say it takes place “all day” without being more specific.
4. Event Venue
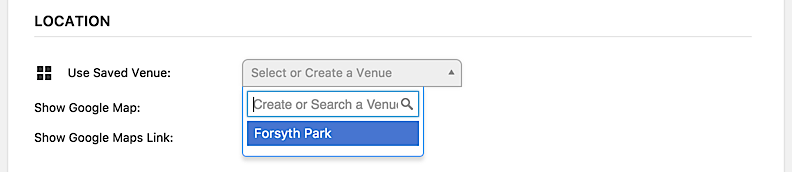
If this is your first time using The Events Calendar, you’ll see this list of fields for creating your first event venue. If you’ve created a venue for a previous event, you’ll have the option of selecting an existing venue from a drop-down menu (you may also type into the search box to narrow your options). Entering a new venue name and selecting the Create option from the menu options will display the new venue form fields below, allowing you to create a new venue for your event.
It’s also worth noting that you don’t need to create (or use) a venue. If you prefer not to specify a venue, simply move on to the next section.
Provide a name for the venue and any optional address details – if you like – a contact phone number and website. The last two checkboxes control whether a map should be shown to visitors and/or a link to a map should be displayed.
If your event is happening a little off the beaten path and there isn’t a mappable address, you can use latitude and longitude instead. To do this, leave the venue without an address. After you’ve created the event, go to Events & Venues and edit the Venue in question. You’ll see an option there for adding coordinates.
Once you’re happy with the event’s venue you can move on to the next section: the organizer details.
5. Organizers
Rather like the venue details, you can select any pre-existing organizer details that you have already entered. Also – just as with the venue details – this area is completely optional.
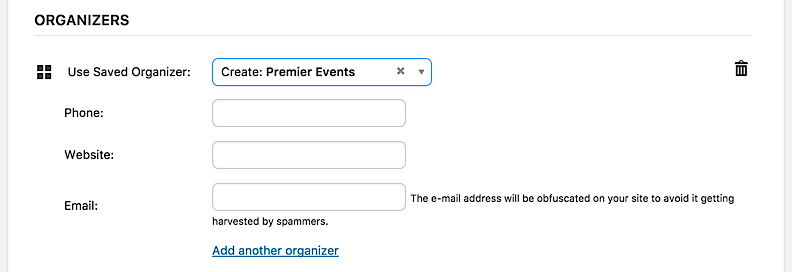
You do not need to provide organizer details and, if you do, you need only provide as much information as you want to. You can add multiple organizers to an event. Keep in mind that if you opt for multiple organizers, any organizer meta (like the phone number or email) will not show on the front-end — only the organizer names will be listed. If you have Events Calendar PRO, the listed names will link to the associated Organizer Page.
This is particularly useful if you are showcasing events organized by external organizations and they have a dedicated event website.
6. Event Website
The next field lets you (optionally) provide an event website. This is particularly useful if you are showcasing events organized by external organizations and they have a dedicated event website with more specific or detailed information.
7. Event Cost
If you don’t provide a cost, then no cost details will be shown to visitors. If the event is actually free then simply provide a cost of 0 (zero) which will then display the event as “FREE”.
Do also note that, in the interests of being as internationally friendly as possible, you are able to make a currency symbol display either before or after the actual amount. Being that FinnSource is based in the U.S., we prefer that the “$” appear as the prefix to the event cost/s.
To display a range of costs (e.g., “$25-$80”), input the first cost followed by a hyphen followed by the second cost – attaching the currency symbol to the second cost. (See example below.)
8. Excerpt
An excerpt is basically an abbreviation of the longer descriptive event content – just one or two sentences in length, often just the first lines of content entered above – used as a short event summary when the event is displayed on the Calendar of Events summation page. IMPORTANT: If an excerpt is not provided, the event will show up on the main event summation page with ALL of the content written in the Event Content field which, in some cases, could be very long.
9 & 10. Taxonomies
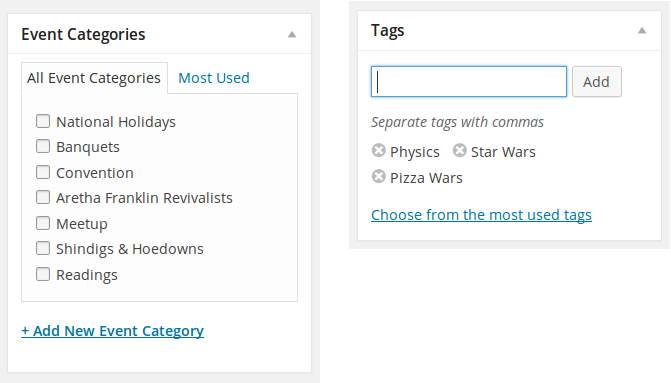
We do not use the “Tags” field on FinnSource as they are often redundant of “Categories”.
It is worth emphasizing that the “Category” list used in the Event Calendar is not the same family of categories as used elsewhere on the site. The Event Calendar categories are, in fact. a distinct family of categories and completely independent and separate of the site’s general compilation.
In other words, if you happen to have an existing category you use for non-event site posts, you should not expect it to appear in the list of event categories – and if it does, well, it just happens to share the same name (but isn’t actually the same).
11. Event Options

Although FinnSource has yet to make use of them a regular practice, you can find the Event Options (usually) found close to the tag and event category meta boxes:
- Sometimes you want to be able to link to an event post (by email, or directly via a menu) but would prefer it isn’t included in the main event views – checking the
Hide from Event Listingsbox accomplishes just that. - You might also happen to have a whole load of events taking place on the same day … naturally, that can cause some problems in month view – and so, at least by default, no more than 3 events per day are shown in that view – selecting
Sticky in Month Viewhelps you to ensure that this event is one of the ones that do show. The question mark’s help text reads, “When events are sticky in month view, they’ll display first in the list of events shown within a given day block.” - The Feature Event option allows you to designate your most important events for extra emphasis on your pages. A
Featured Eventwill be highlighted in event views, archives, and widgets, making it a great choice for special engagements that you’d like to have front and center.
12. Featured Image
The featured image represents the contents, mood, or theme of the event. It can also represent the event organization via its logo or other brand identity. The featured image for an event will be displayed alongside the excerpt found on the main calendar summation page. It will also be displayed on the event page itself as the main image.
If no featured image is set, the event will not be illustrated on the main calendar summation page.
13. Event Status
You can choose to select from one of the following options:
- Scheduled -– Will list if the event is Scheduled
- Canceled -– Will display the word Canceled at the top of your event page; you can opt to include a reason if you prefer.
- Postponed -– Displays a Postponed label on your event; can include a reason if you’d like.
If, after publishing the event to the Events Calendar, the event status changes, you can edit the status here and it will then be updated in the calendar display.
14. Publish
Two publishing options are available: “Publish immediately” or the author/editor can set a publish date (and time of day) sometime in the future.
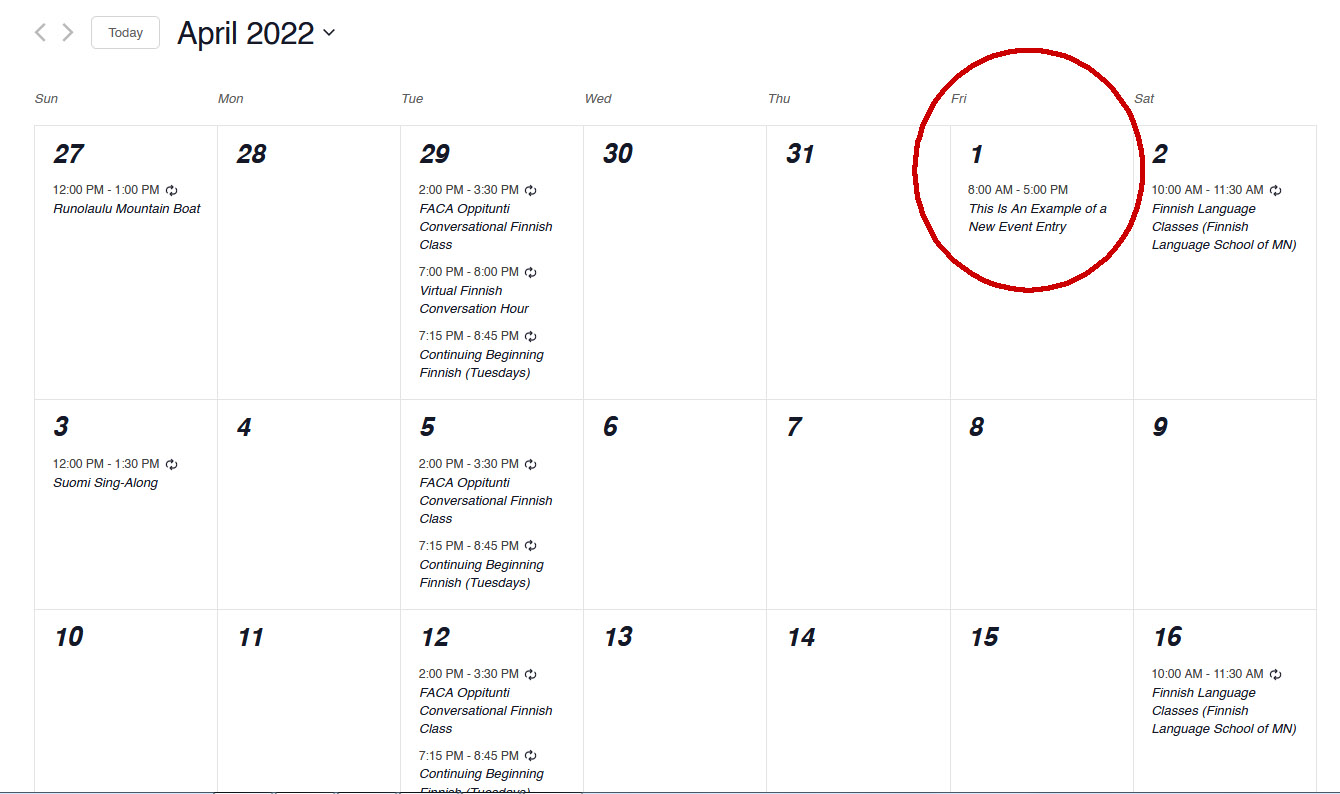
Example of a completed new Single Event:
How the event will appear on the main events summation page:
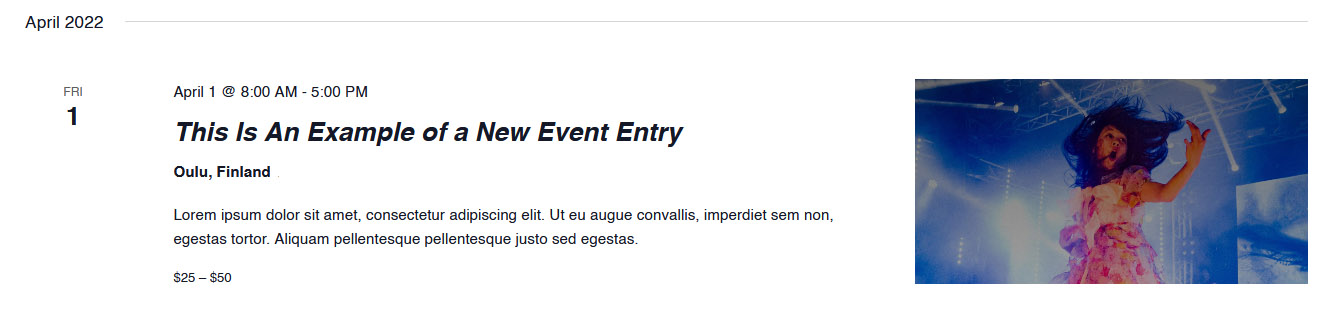
How the event will appear on the Event Calendar: